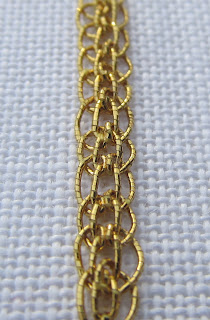
The Buttonhole Edge can be worked on both sides of the Reverse Chain Stitch, or one side only.
It's a nice stitch for linear motifs such as vines & plant stems.
For this tutorial it has been worked in 371 gold wire by Golden Threads using a #24 tapestry needle on 50 ct. Kingston linen.
(Note: I apologize for the extra spacing throughout this tutorial. Blogger would not allow for proper formatting).
Begin by stitching a row of Reverse Chain (if not familiar with this stitch, see my Reverse Chain Tutorial).
Upon completion of the Reverse Chain, bring the thread to fabric surface slightly below your last chain, as shown in photo to right.
You will be adding a Buttonhole stitched edging to the Reverse Chain.
To do this take the needle up through the 2nd chain as shown at left...
Then down through the first chain. Make sure the needle is overlapping the working thread as you pull it through the chain (as shown in the photo at right).

This creates the first buttonhole stitch.

Repeat the process by taking the needle up through the 3rd chain,
 and back down through the 2nd chain.
 Two buttonhole stitches have been completed.
 Repeat these steps for the rest of the chain stitches.
 When you reach the last chain stitch, take the thread to the back of the fabric. This completes Reverse Chain with a Single Buttonhole Edge.
To work a Double Buttonhole Edge simply repeat the process for the opposite side of the chain stitches, starting with the last chain shown in this photo.


Very clear, Kimberly. And as you say, it's a useful stitch!
ReplyDeleteLove this stitch, thank you for the nice comments you left me on Blog !
ReplyDeleteThis is brilliant, thanks so much for the clear concise instructions.
ReplyDelete